Create a project
Set up a new client job in six short steps: name, location, client, markup, who your client sees, and a final review.
Why use it
A project is the home for everything on a job: rooms, products, approvals, invoices, documents and the client's portal. Setting it up properly once means the right name, code, markup and contact person flow into every proposal, invoice and email after it, instead of being fixed by hand later.
When to use it
- A new client signs on. Create the project as soon as the job is agreed, so you can start adding spaces and requesting a retainer.
- A new phase or property for an existing client. Create a separate project and choose the existing client on the client step.
- Pitching before the client is confirmed. Skip the client and add them once they say yes.
Before you start
- You need to be the owner or an admin.
- Open Projects in the sidebar.
- Choosing the client-facing contact, the project manager and invoice copies needs the matching permissions (Client-facing identity, Project managers, Invoice copy settings). Without them, the firm defaults are used.
Steps
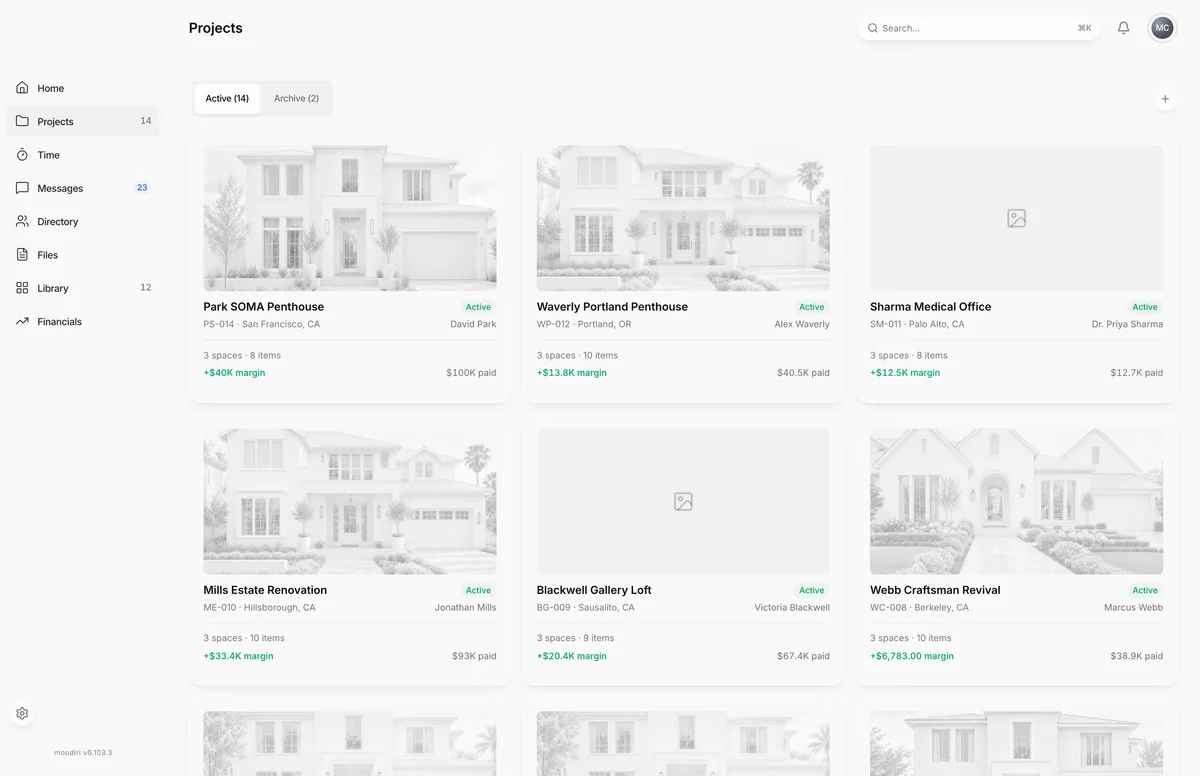
- On the projects list, choose New project. The project wizard opens.
- Type the project name, for example Pacific Heights Townhouse. Moodiri fills in the Project code for you.
- Pick a Project type, Residential, Commercial or Hospitality.
- Choose Next, then under Where is this project? fill in the address. City and State are required.
- Under Who's the client?, search your clients by name or email, or choose + Add new client. No client yet skips this.
- Set a markup for this project, for example 30%. It overrides your firm default for every product here. Use org default skips it.
- Choose the Client-facing contact, the Project manager, and who gets Invoice copies.
- Choose Review, check the summary, then choose Create project (or Continue to sales tax when sales tax is on).
What happens next
- Moodiri creates the project and opens its overview.
- If the client has an email address, you are asked whether to invite them to the project portal. Choose Send invite, or I'll do this later. You can invite them any time; see Invite a client to the portal.
- Then you are offered Add a space, the first room of the project. See Add a space.
- When sales tax is set up for your firm, the last step is Continue to sales tax. You review the address-based rate and choose to accept it, enter your own with Edit rate, or Keep sales tax off before the project is created.
Limits
- Six steps: name, location, client, markup, client-facing contact, and review.
- A project name, a city and a state are required.
- You can add up to two clients in the wizard: a primary client and one more. Add others later from Manage clients.
- With sales tax set up, the last step is Continue to sales tax, and the project is only created once you make a sales tax decision.
- A new client's email must not already belong to another client in your firm. If it does, choose Use existing client instead or change the email.
Troubleshooting
- A client with this email already exists: the person is already in your client list. Choose Use existing client instead so the project links to the existing record.
Questions
Can I create a project before I know the client?
Yes. Choose No client yet on the client step. Add the client later from the project's Clients panel.
I closed the wizard by accident. Is my work lost?
No. The next time you open New project in the same browser, Moodiri asks Continue where you left off? Choose Yes, restore, or Start fresh.
Can I change the project code later?
Yes, in Edit project. Invoices already issued keep their numbers; new ones use the new code. See Edit project details.